From Laziness to Control: Reversing an IoT device using Frida
Have you ever had that irresistible urge to take apart a cheap IoT device you bought from a random store? You know, that feeling that says, “Let’s dive into the mystery and figure out how this thing actually works!” But then you stop and ask yourself, “Why am I even doing this?” and struggle to come up with a good reason. Well, let me tell you, if there was a Ph.D. for taking apart useless things, I’d probably have earned it!
Today, we’re going to explore the exciting world of reverse engineering, with a focus on understanding the device’s communication protocol. And here’s my little secret: this is my go-to trick when I’m feeling a bit lazy. Get ready for some tech magic, my friends!
Exploring the Target Device
Alright, let’s kick off our journey by addressing the question: What are we going to reverse engineer? Last week, I purchased an LED strip stand (as shown in the image), which came with a controller and a questionable phone app. From my experience, these types of apps usually communicate through Bluetooth. However, I’m not entirely certain about the controller itself. It could be using infrared, Bluetooth, or maybe even something entirely different (but probably not)?

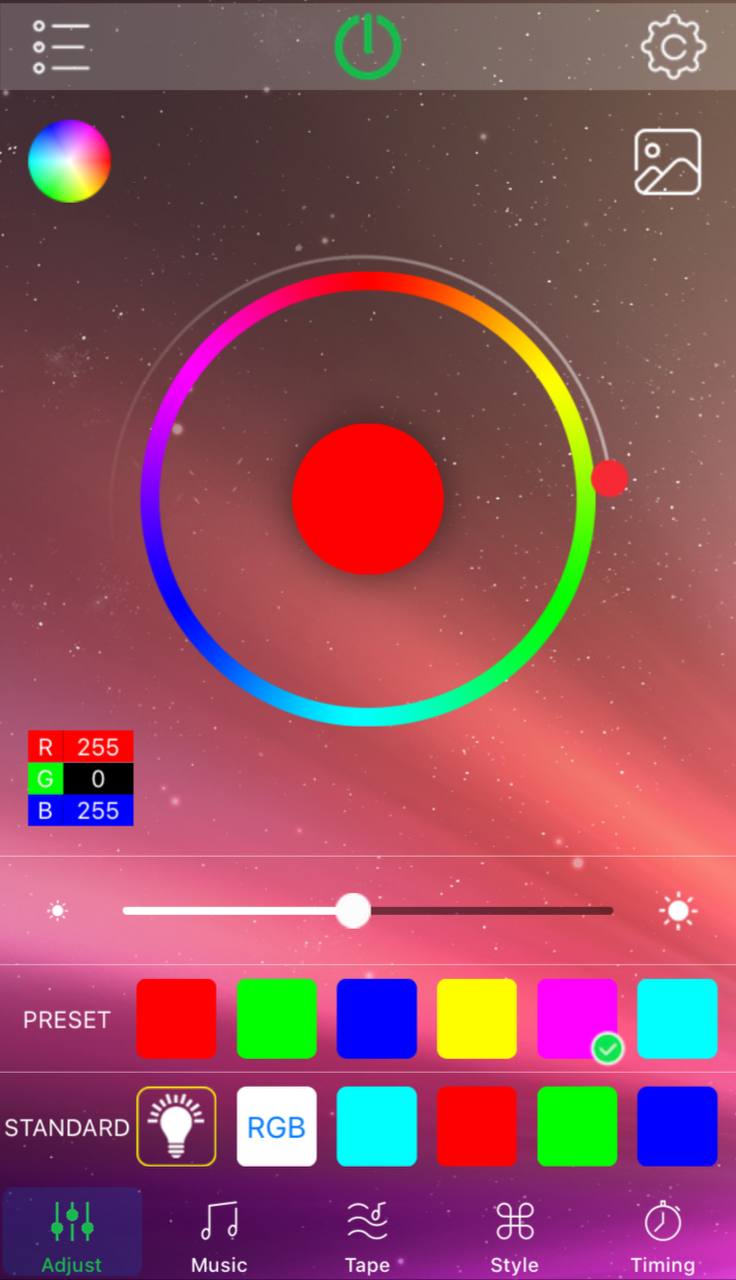
Now, here’s the deal: I want to ditch the app because it’s been tickeling me crazy. To achieve this, I need to uncover the commands that are being sent from the app to the LED strip. Once I have a clear understanding of these commands, I can rewrite them in a programming language that I’m comfortable with. So, our goal is set: let’s crack the code.
Choosing the Right Approach
In order to achieve our goal of taking down the app and gaining control over our LED strip, we have several options available. Let’s explore each one:
-
Dump the LED strip’s firmware and reverse it: This approach involves extracting and analyzing the firmware of the LED strip itself. However, it requires extensive knowledge of hardware and may consume a significant amount of time and effort. Considering the complexity and potential challenges, this approach may not be the most convenient choice for a simple strip light.
-
Dump the controller’s firmware: This method involves extracting and examining the firmware of the controller. Similar to the previous approach, it requires hardware knowledge and can be time-consuming. While it provides valuable insights, it may not be the most suitable option for our scenario.
-
Use a magical device to sniff Bluetooth communication: This option involves employing a specialized device to intercept and analyze the Bluetooth communication between the app and the LED strip. Unfortunately, obtaining such a device might be difficult or costly, making it less reliable for our purposes.
-
Dissect the mobile app and reverse engineer it: This is the approach I have chosen, and let me tell you why. Tackling the mobile app allows us to dive into its inner workings, understand the commands it sends to the LED strip, and ultimately rewrite those commands according to our preferences. It’s a more accessible option, requiring reverse engineering skills but without the hardware-intensive aspects of the other methods.
Considering my inclination toward efficiency and laziness, focusing on dissecting and reverse engineering the mobile app appears to be the most favorable path forward. Let’s dive into the app’s code and unveil its secrets!
When we’re faced with a big challenge like reading lots of messy code written in Java or Kotlin, it can be really tiring to go through it all by hand. But don’t worry, I’ve got a solution that’s both efficient and effective. Our main goal is still clear: we want to figure out how the app communicates and extract the important commands, without getting too caught up in the app’s inner workings.
Here’s where dynamic analysis comes in. It’s a smart technique that lets us skip the hard work of reading all that code manually. Instead, we can focus on the most important parts. And to make things even easier, we’ll use Frida, a handy tool that can help us with our analysis.
By using dynamic analysis and Frida, we’ll be able to work smarter, not harder (I made up this excuse to cover up my laziness :d ). We’ll be able to find the key details of the communication protocol without getting lost in all the other stuff. Get ready to see how this combination of analysis and Frida can make our job much simpler and more efficient.
Environment Setup
Let’s set up the environment for our project. Here are the steps:
-
Rooted Android device: We’ll need a real Android device that has been rooted for this project. Emulators won’t work because they don’t support the Bluetooth stack. Some emulators might have a simulated Bluetooth connection, but we need to connect to a real device. Also, install the
HappyLightingapp. -
ADB (Android Debug Bridge): We’ll use ADB to communicate with the Android device. You can install ADB on Debian-based Linux distributions by running the following command:
sudo apt install adb
Note: Make sure you have enabled Developer Options on your Android device.
- Frida: We also need to install Frida (You need Python) on both the computer and the Android device.
On your computer, run the following command to install the frida-tools:
pip install frida-tools
On the Android device, first download the appropriate frida-server binary for your device’s CPU architecture from here!. Then, push the frida-server to the device by running these commands:
adb push /path/to/frida-server /data/local/tmp/
adb shell chmod 755 /data/local/tmp/frida-server
adb shell /data/local/tmp/frida-server &
To verify that everything is working correctly and that you can communicate with the frida-server, run the following command on your computer:
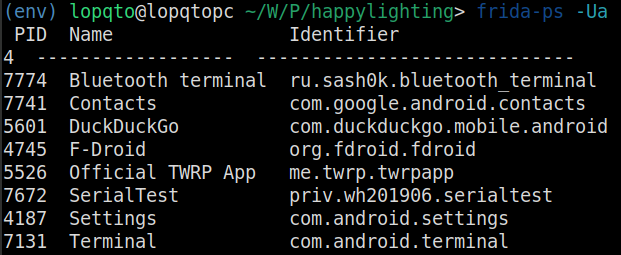
frida-ps -U
You should see a list of running processes on your Android device.
With these steps completed, we have our environment set up and ready to go.
Reversing the Communication Protocol
Finally, we’ve reached the exciting part where we dive into reversing and getting our hands dirty. But before we begin, let’s discuss our approach. If you’re already familiar with Frida and how it works, great! If not, take a quick look here! to get acquainted.
In simple terms, our goal is to find the specific function responsible for sending commands to the LED strip device, hook it using Frida, and log those commands. This way, we can reimplement a basic Bluetooth client and send the commands ourselves.
Now, you might be wondering how we can achieve this without delving into the complexities of reversing the Android application. Well, let’s take a step back and think outside the box for a moment. Do we really need to locate specific functions? In fact, what is the “right” function we want to hook?
To answer that, we need to consider a different perspective. We’re interested in the last function in the chain of the functions that handles and sends the commands to the device. Why the last one? Because we want to capture the raw payload being sent to the device, including any checksums, encodings, or padding applied. We need the raw payload as our starting point. We can capture that payload, send it to the device, and see if it works. If it does, great! If not, we can backtrack and analyze the chain further.
So, what is this last function responsible for sending the Bluetooth payload? Well, you guessed it! It’s the Java Bluetooth function from the Android SDK. Ultimately, Java and the Android SDK are responsible for delivering the payload to Android’s Bluetooth stack. Therefore, we can conveniently ignore all the code and simply hook the Java Bluetooth function. That’s all there is to it. We can reverse the communication protocol without actually having to reverse the entire application (if we’re fortunate enough that capturing and emulating the raw payload works for us).
With this approach, we’re ready to uncover the secrets of the communication protocol and create our own Bluetooth client. It’s time to embark on this reverse engineering journey and see where it takes us!
To implement hooking with Frida, we need to find the Bluetooth function’s signature. After some searching, we come across the android.bluetooth.BluetoothGattCharacteristic class, which has a function called setValue responsible for sending payloads through Bluetooth. The function signature is as follows:
public boolean setValue (String value)
Take your time and look at the examples provided by Frida docs here!. Now, let’s write a proper hook for the setValue function using Frida:
Java.perform(function () {

    var BluetoothGattCharacteristic = Java.use('android.bluetooth.BluetoothGattCharacteristic');

    // setValue(String)
    BluetoothGattCharacteristic.setValue.overload('java.lang.String').implementation = function (value) {
      console.log('[BluetoothGattCharacteristic.setValue] Value (String): ' + value);

      // Call the original method and return the result
      var result = this.setValue(value);
      return result;
    };

  });
This code sets up a hook on the android.bluetooth.BluetoothGattCharacteristic.setValue() function. Whenever this function is called, it will log the inputs (hopefully the commands we’re looking for) to the console.
However, we notice that there are three more overloads for this function, as mentioned in the Android Developer documentation here!.
In Java, method overloading is the ability to define more than one method with the same name in a class. The compiler is able to distinguish between the methods because of their method signatures1. This means that multiple methods can have the same name as long as the number and/or type of parameters are different. Method overloading is mainly used to increase the readability of the program; to make it look better. For example, instead of defining two methods that should do the same thing, it is better to overload one.
To ensure we don’t miss anything, let’s implement hooks for these overloads as well:
Java.perform(function () {
    var BluetoothGattCharacteristic = Java.use('android.bluetooth.BluetoothGattCharacteristic');

    // Overload 1: setValue(String)
    BluetoothGattCharacteristic.setValue.overload('java.lang.String').implementation = function (value) {
      console.log('[BluetoothGattCharacteristic.setValue] Value (String): ' + value);

      // Call the original method and return the result
      var result = this.setValue(value);
      return result;
    };

    // Overload 2: setValue(byte[])
    BluetoothGattCharacteristic.setValue.overload('[B').implementation = function (value) {
      // Convert byte array to hex string
      var hexValue = bytesToHex(value);

      console.log('[BluetoothGattCharacteristic.setValue] Value (byte[]): ' + hexValue);

      // Call the original method and return the result
      var result = this.setValue(value);
      return result;
    };

    // Overload 3: setValue(int, int, int)
    BluetoothGattCharacteristic.setValue.overload('int', 'int', 'int').implementation = function (value1, value2, value3) {
      console.log('[BluetoothGattCharacteristic.setValue] Values (int, int, int): ' + value1 + ', ' + value2 + ', ' + value3);

      // Call the original method and return the result
      var result = this.setValue(value1, value2, value3);
      return result;
    };

    // Overload 4: setValue(int, int, int, int)
    BluetoothGattCharacteristic.setValue.overload('int', 'int', 'int', 'int').implementation = function (value1, value2, value3, value4) {
      console.log('[BluetoothGattCharacteristic.setValue] Values (int, int, int, int): ' + value1 + ', ' + value2 + ', ' + value3 + ', ' + value4);

      // Call the original method and return the result
      var result = this.setValue(value1, value2, value3, value4);
      return result;
    };

    // Helper function to convert a byte array to a hex string
    function bytesToHex(bytes) {
      var hexArray = [];
      for (var i = 0; i < bytes.length; ++i) {
        var byteString = (bytes[i] & 0xff).toString(16);
        hexArray.push(byteString.length === 1 ? '0' + byteString : byteString);
      }
      return hexArray.join('');
    }
  });
With this code, we have implemented hooks for all the overloads of the setValue function. Each hook will log the inputs to the console, allowing us to capture the commands we’re interested in. This way, we can move forward with analyzing and emulating the captured commands.
To run Frida with the hooks and capture the output, execute the following command in the terminal:
frida -U -f com.xiaoyu.hlight -l bt_hooks.js
bt_hooks.js is the filename of the JavaScript code containing the hooks and com.xiaoyu.hlight is the package name of the HappyLighting app.
Once the Frida script is running, you can test the functionality by turning the LED strip on and off using the app. The console output should display the captured commands.
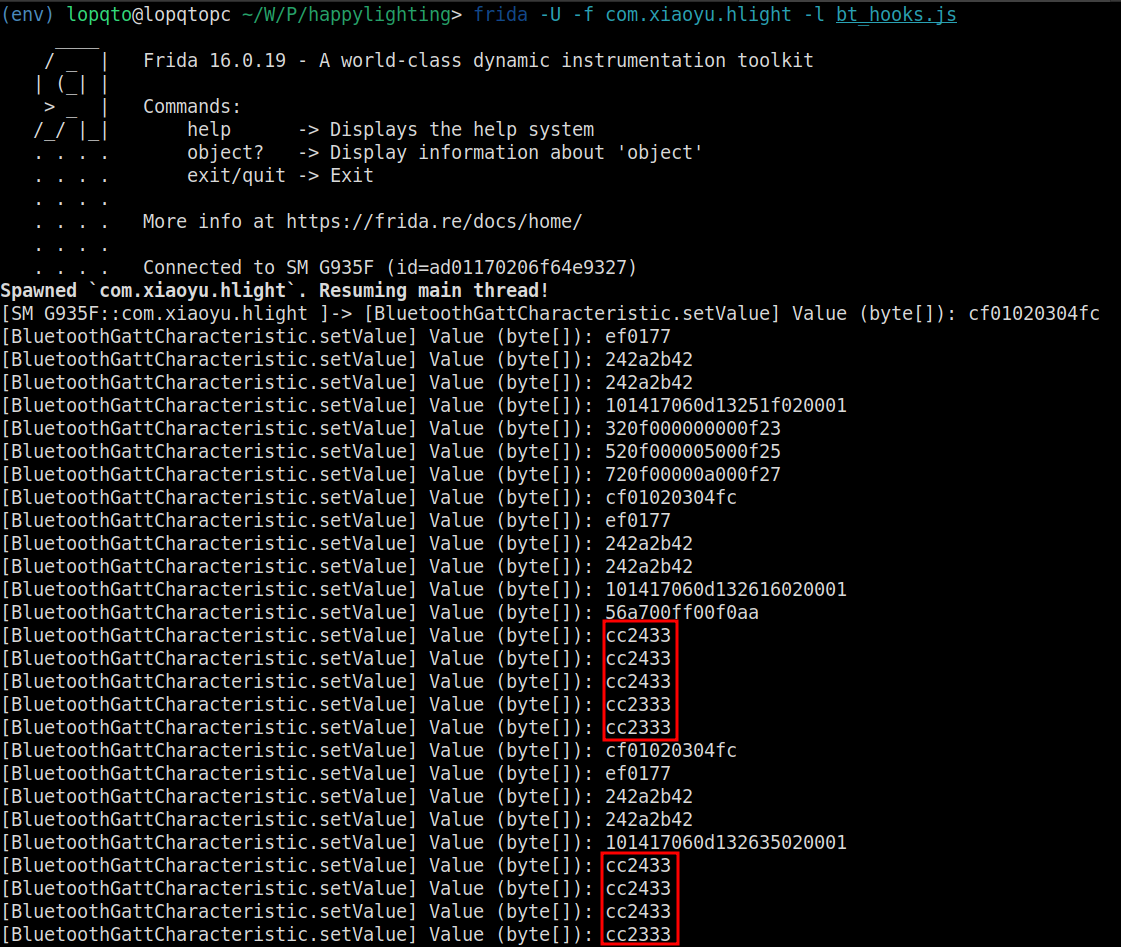
In this case, we see that cc2333 is the command for turning on the LED strip, while cc2433 is the command for turning it off. The static parts cc and 33 indicate some command indicator, and we can assume that 23 is for turning on the LED strip and 24 is for turning it off.
Hopefully, by sending these commands (cc2333 to turn on and cc2433 to turn off) to the LED strip ourselves, we can control its status accordingly.
To further explore the functionality and reverse-engineer the commands, let’s change the LED strip’s mode through the application and observe the corresponding commands. By switching between the “Rainbow pulsating” and “Red pulsating” modes multiple times, we can capture the commands associated with each mode.
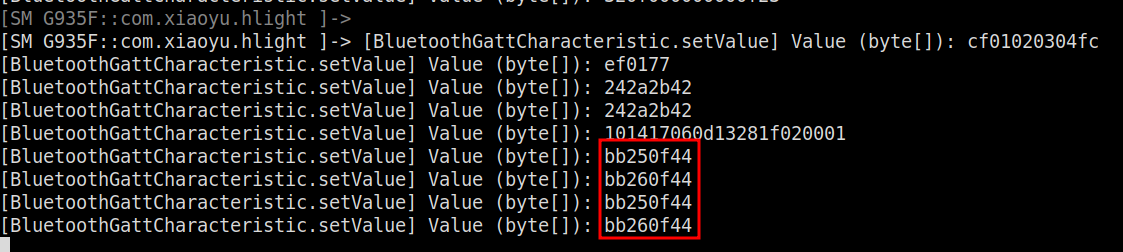
After analyzing the captured commands, we can observe that bb260f44 corresponds to the “Rainbow pulsating” mode, while bb250f44 corresponds to the “Red pulsating” mode. From our previous understanding of the command structure, we can deduce that the bb and 44 parts likely serve as command indicators.
However, we notice another part in the commands: 0f. By further experimentation, specifically by adjusting the speed of the effect, we can observe that the 0f portion changes accordingly. For example, 01 represents the maximum speed, while 1f corresponds to the minimum speed.
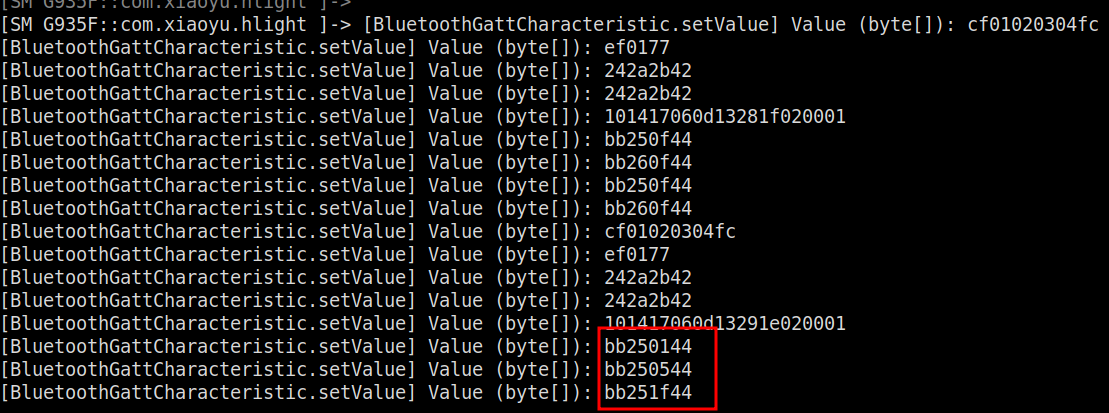
Therefore, we can conclude that the 0f portion of the command likely represents the speed parameter, with different values indicating various speed settings.
I believe we can wrap things up at this point since I think I have successfully demonstrated the concept I had in mind. Now, let’s proceed to the next section where we will develop a straightforward client application to control the LED strip.
Writing a Custom Client
To write a simple client, I opted for Python as my preferred language since it’s the one I usually turn to when exploring new concepts. However, you are free to choose any programming language that you’re comfortable with.
Here’s the code:
import asyncio
from bleak import BleakClient

# Bluetooth device information
device_address = "92:3B:12:00:0D:B2"  # MAC address of the device
characteristic_uuid = "0000ffd9-0000-1000-8000-00805f9b34fb"  # UUID of the characteristic

# Payload in hex string format
payload = bytearray.fromhex("cc2333")

async def write_payload():
    async with BleakClient(device_address) as client:
        await client.is_connected()

        # Write the payload to the characteristic
        await client.write_gatt_char(characteristic_uuid, payload, response=False)

        # Disconnect from the device
        await client.disconnect()

# Run the write_payload coroutine
loop = asyncio.get_event_loop()
loop.run_until_complete(write_payload())
In the provided code snippet, the device_address variable represents the MAC address of the Bluetooth device you want to connect to. It is a unique identifier assigned to each Bluetooth device. You should replace the device_address value with the actual MAC address of your target device.
The characteristic_uuid variable represents the UUID (Universally Unique Identifier) of the specific characteristic on the Bluetooth device that you want to interact with. Characteristics are attributes of a Bluetooth device that enable specific functionalities or data exchange. You should replace the characteristic_uuid value with the actual UUID of the characteristic you intend to communicate with.
By knowing the MAC address and characteristic UUID, you can establish a connection with the Bluetooth device and utilize the corresponding characteristic to perform operations such as reading, writing, or subscribing to data.
There are multiple methods to obtain the MAC addresses and characteristics UUID of the target device. One approach is to write a simple code snippet using the bleak library, while another option is to utilize Android applications such as Bluetooth Terminal.
By following these steps, we have successfully achieved control over the LED strip using our custom client. While we could continue expanding the functionalities of our client, for the purpose of this blog post, it is sufficient to conclude our exploration here.
Conclusion
In conclusion, through our exploration, we have demonstrated the process of reverse engineering a communication protocol and controlling an LED strip. By utilizing the power of Frida, we were able to identify the relevant functions responsible for sending commands to the LED strip. By hooking these functions and capturing the command payloads, we gained insights into the communication protocol.
With this knowledge, we successfully developed a custom client that allows us to control the LED strip independently of the original mobile application. By sending the captured commands, we could turn the LED strip on and off, change its colors, and switch between different lighting modes.
It is important to acknowledge that achieving the desired outcome quickly is not always guaranteed in every reverse engineering scenario. The complexity of protocols and security measures can vary greatly, often necessitating more extensive analysis and reverse engineering efforts. However, in our case, the dynamic analysis approach we employed proved to be highly effective, significantly accelerating the process and saving us many hours of traditional reverse engineering work.
Overall, this post demonstrates the excitement and possibilities that arise from reverse engineering and taking control over IoT devices, opening up new avenues for customization and creativity.
I hope it was helpful. If you have any further questions, please feel free to reach out.
